

Google Ads (pay per click) for Small to Medium Business
Last week’s post in the our Digital Marketing Series focused on Search Engine Optimization which falls under the umbrella of Search Engine Marketing. SEO is the foundation of any Search Engine Marketing Strategy. Your Search Engine Marketing strategy, in addition to SEO Services, should employ another tool sometimes referred to a as “pay per click” to optimize and improve your results. Pay per click, allows you to define, control and measure your on online marketing efforts, such as, geography, cost, conversion rates and return on investment. The main difference is it is paid for while SEO is completely organic (non paid). It’s easy to get started and in this post we’ll make some suggestions and cover the basics of getting started with Google Ads (formerly Adwords). There are plenty of resources that will take you thru step by step on creating your very own campaign. In this post, we’ll be walk you through building your own campaign and illustrate a Google Ads tool that might benefit your small business. If you are looking for step by step guide on building your own Adwords campaign google has some great resources to creating and managing your own campaign. The first thing before we need to do before anything else is to figure out how people are searching for the products and services we offer.
Keyword Planning
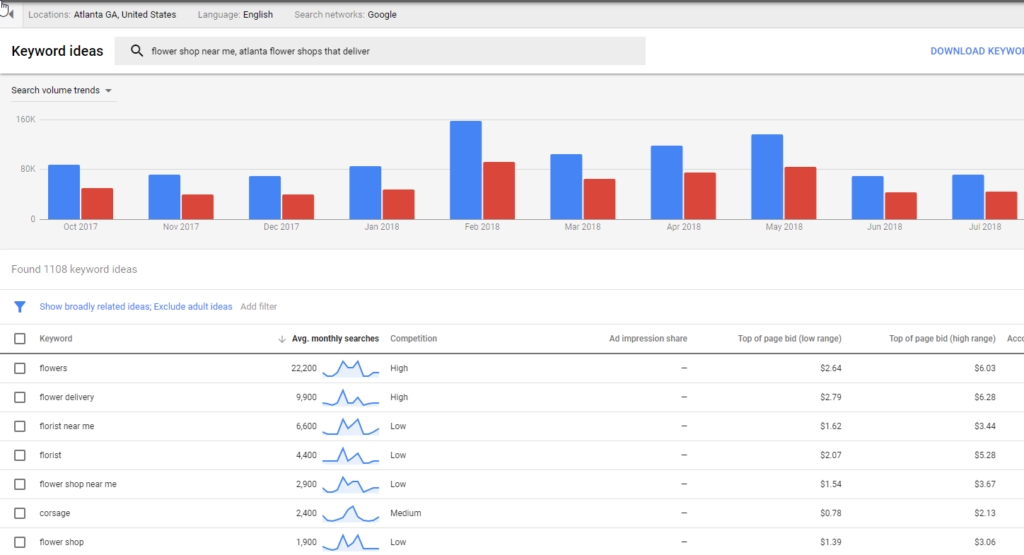
To do that you need to think like your customer. What would you type in the search box to find the products and services you offer? What are the keywords that you want your ads to show for? Google Ads refers to these as impressions. Once you’ve done that, head over the to Google Ads create an account and begin using their keyword planner to find out which search phrases are best for your business. The report will show you number of searches per month, average cost per click, and what the bid range is for top of page placement. Keywords take some practice and experimentation until you find out what works best for your business. In the example below I searched for “Atlanta Flower Shops that Deliver”. You can see that it gave me a list of keywords that might be suitable for my ads campaign and the number of times they are searched monthly. Pretty helpful.

Establish a Ad Budget
Keyword planner also gives you guidance on what people are paying per click for the keyword combinations you’ve chosen. That helpful when trying to establish a monthly budget. There are also several tools out there like Spyfu.com that will even tell you what keywords your competition is bidding on and how much they are paying for those clicks. Ubersuggest which we linked to above is another great tool to see how much competitors are paying for specific keywords. Start with a small budget of maybe $60 per month ($2 per day) and as you get more comfortable you can raise your budget. Let’s go ahead and get started with our campaign.
Setup your Adwords Campaign
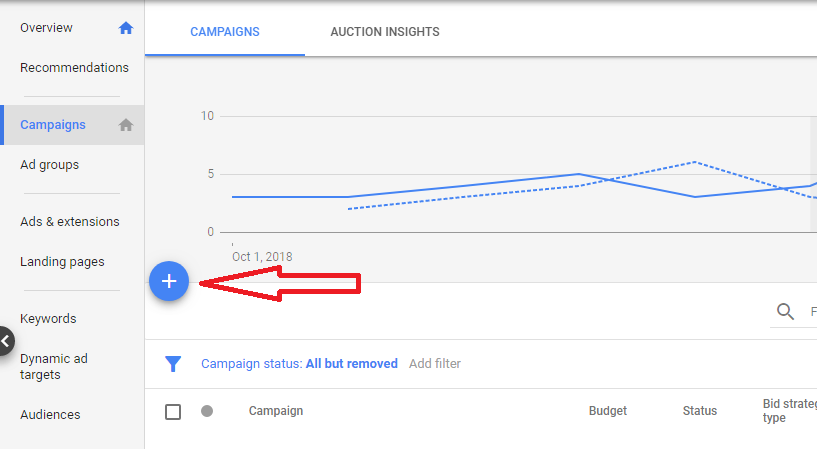
I’m going to assume that for the purpose of this article that you have your adwords account setup. If not, here is an article by Google on with instructions on how to create your adwords account. We will walk through the process and a couple of best practices when creating an Adwords campaign. Don’t worry you won’t be charged for anything until you have completed the process and enabled you ads. The first thing to do once logged into adwords is to click on “Campaigns” and then the large plus sign slightly to the left and halfway down the screen. Next Choose the “new” campaign option.
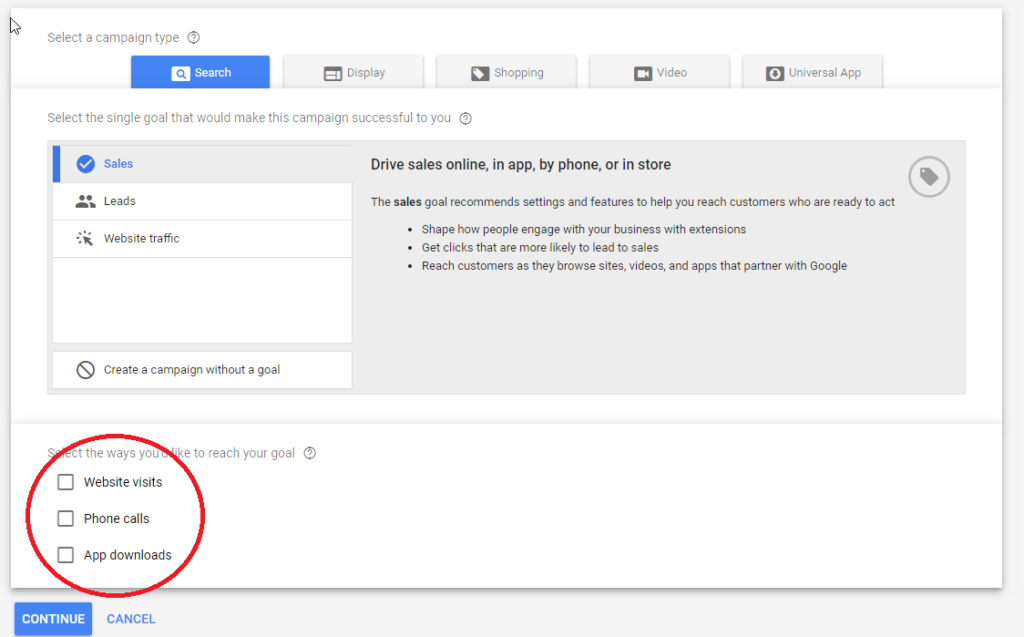
At this point, you will be given a few options as to the type of campaign you would like run. For the purpose of this article we are going to choose “search” and then the “sales” option. Next select the ways you want to reach your sales goals by choosing what you want people to do when they see your ad. Choose “website visits” and “phone calls” Then click continue. See the screenshot below.
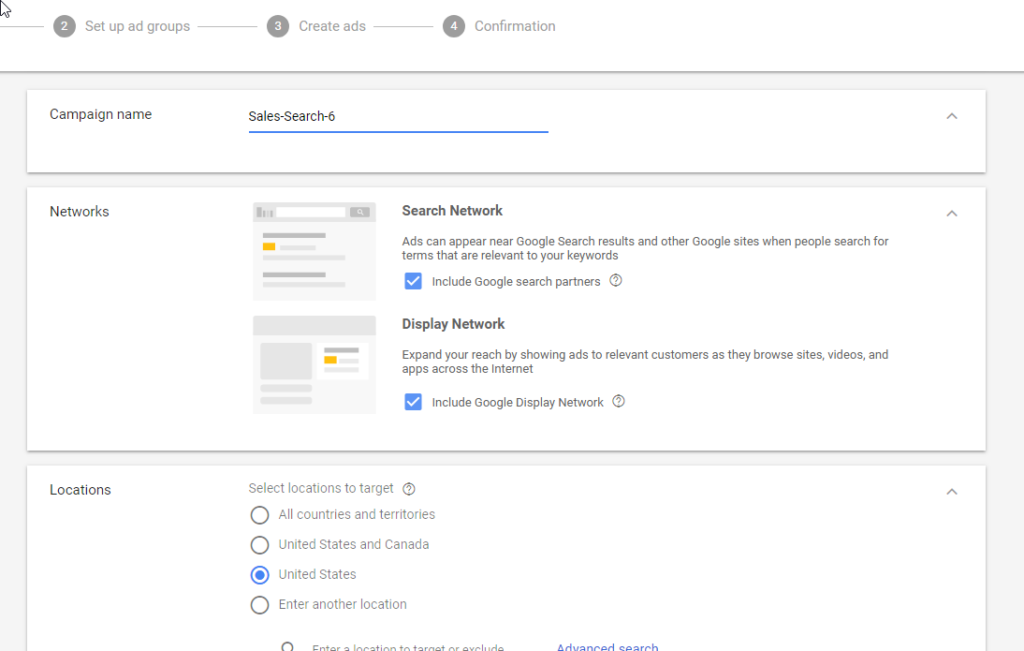
You’ll now need to name your campaign and define the geographic region of the audience you wish to reach. For our current campaign we are going to be using “text” ads so you will want to leave the Display network option unchecked. If you are a local business, you’ll want to define your service area and the distance you think people might travel to purchase your goods and services. Adwords makes it simple to drill and define the area by either entering the city, town name or metro.
Once you have the audience location defined scroll down and complete the following prompts, Language, Budget (per day) and for Delivery Method check “Standard”. Next you will want to choose your campaign start date (make sure you put your start date a few days in the future so it does not start immediately after your save it) and end dates along with the hours you would like your ads to run. Leave the audiences (for display ads) field blank and choose account level Callout extensions. Click Save and Continue.
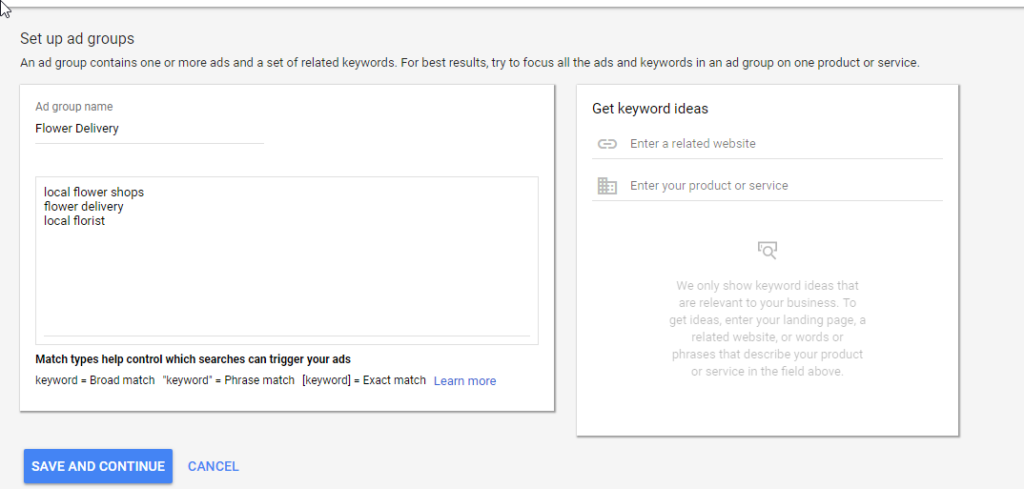
Create your Ad Groups
It is generally a best practice to create 2 Ad Groups with a minimum of 3 Ads in each group. Doing so allows us to monitor performance of our ads and make small adjustments to achieve better results. For this exercise, we are only going to setup one ad group and one ad. You can go back and create another ad group and more ads when you are ready by simply repeating the steps and modifying the content of the ads. Each Ad Group contains one of more ads and a set of keywords ( which you should have researched earlier). The first step is to name your Ad Group and copy and paste the keywords ( start with 10 or more ) into the space provided on Ad Group set up screen. See the example for a flower shop below. Click Save and Continue.
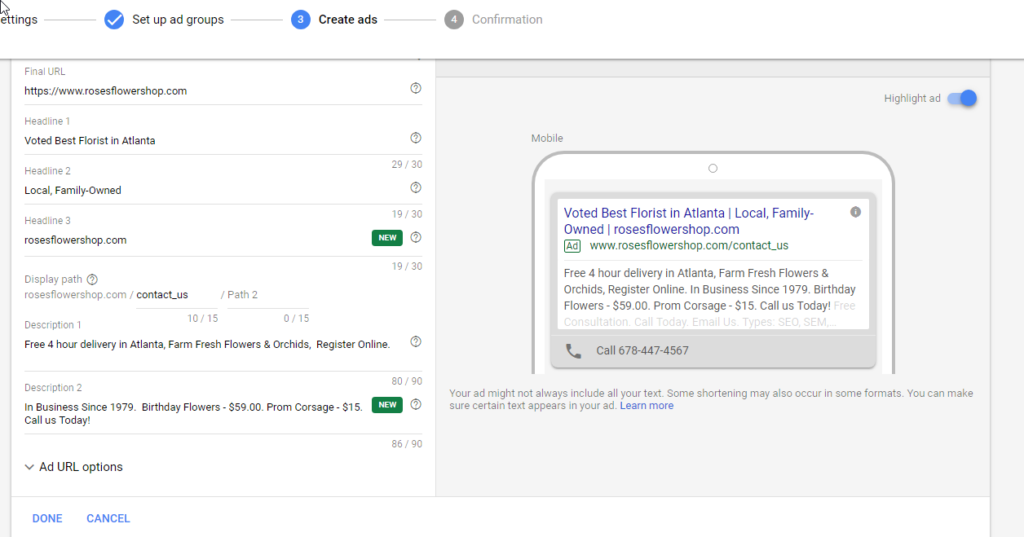
Create our Google Ads
Next you will create your ad. See the example below for how the layout should look. You’ll notice on the left that it will show you how your ad will look as you add your content. You’ll have to be creative here because characters are limited on each line. A couple of things to remember when creating your ads – Google shows ads to users based on Ad Quality and Bid amount so if you are bidding high with a poor quality ad it will be less likely to be displayed in a top position. On the other hand, if you are bidding competitively ( based on the suggestions in keyword planner) and you have a well written ad it will likely show in a higher position. You are probably wondering what factors into a quality ad. First, it needs to be well written. Misspellings, grammer, execessive capitalization affect your ad quality. Next, you’ll need to make sure that you using quality keywords and that those keywords are sprinkled into the ad copy when possible. You’ll want to avoid generic keywords like “flowers”. It’s too broad. Instead, focus on “long tail keywords” which contain 2-3 words. For example, the keyword phrase “local flower shop” is more specific. Keywords are a large part of being successful with Google Ads. As you get more practice, you will want to look into more keyword variations for your Ad Groups. Here is an good article on how to get the most out of your keyword matches. If you are satisfied with your ad, go ahead and click save and continue. Your done!
So far in this blog series we’ve gone over Search Engine Optimization (SEO) and several simple things you can do to improve your rankings. In this post, we laid out how you can create your own Google Ads Campaign and add a another tool to your digital marketing toolkit. Next week, we’ll dive into Social Media and Hub and Spoke Content Marketing. I hope you find this helpful and look forward to next time.
TrueITPros is an Atlanta Managed Service Provider delivering IT Services, IT Support, and Digital Marketing to small and medium sized businesses. Our IT consulting service includes supporting clients both locally and remotely as needed. TrueITPros service area includes the metro Atlanta area including the following cities: Dunwoody, Roswell, Alpharetta, Johns Creek, Marietta, Norcross, Decatur, Buckhead, Kennesaw, Duluth, Snellville, Brookhaven and Lilburn Many of our clients have multiple locations and out of state locations too.
If you are looking for IT Support in Atlanta please call us at (678)534-8776 or email us.